
CSV Upload
👤 This documentation is intended for SQL Users using Sisense's Cache or Warehouse Infrastructure options. Site administrators can contact their Account Manager if interested in enabling the Sisense Cache or Warehouse.
With CSV Uploads, a static CSV file may be uploaded into the Sisense Cache as a table and then used in any chart.
<div><UL>
<LI><a href="#UploadCSV">Uploading a CSV</a></LI>
<LI><a href="#Troubleshooting">CSV Upload Requirements</a></LI>
<LI><a href="#NameCSV">Naming a CSV View</a></LI>
<LI><a href="#CSVStatus">CSV View Status</a></LI>
<LI><a href="#SelectFromCSV">Selecting From a CSV View</a></LI>
<LI><a href="#JoinToCSV">Joining to a CSV View</a></LI>
<LI><a href="#CSVSettings">CSV View Settings</a></LI>
<UL>
<LI><a href="#CSVDataset">Publish a CSV View as a Dataset</a></LI>
<LI><a href="#AutoArchive">Exclude From Auto Archive</a></LI>
<LI><a href="#Official">Mark As Official</a></LI>
<LI><a href="#TopicView">Adding a CSV View to a Topic</a></LI>
<LI><a href="#AddDescription">Adding a Description</a></LI>
<LI><a href="#CSVOwner">Changing a CSV View Owner</a></LI>
</UL>
<LI><a href="#DeleteCSV">Archive and Delete a CSV View</a></LI>
</UL></div>
<HR>
<a name="UploadCSV"></a>
Uploading a CSV
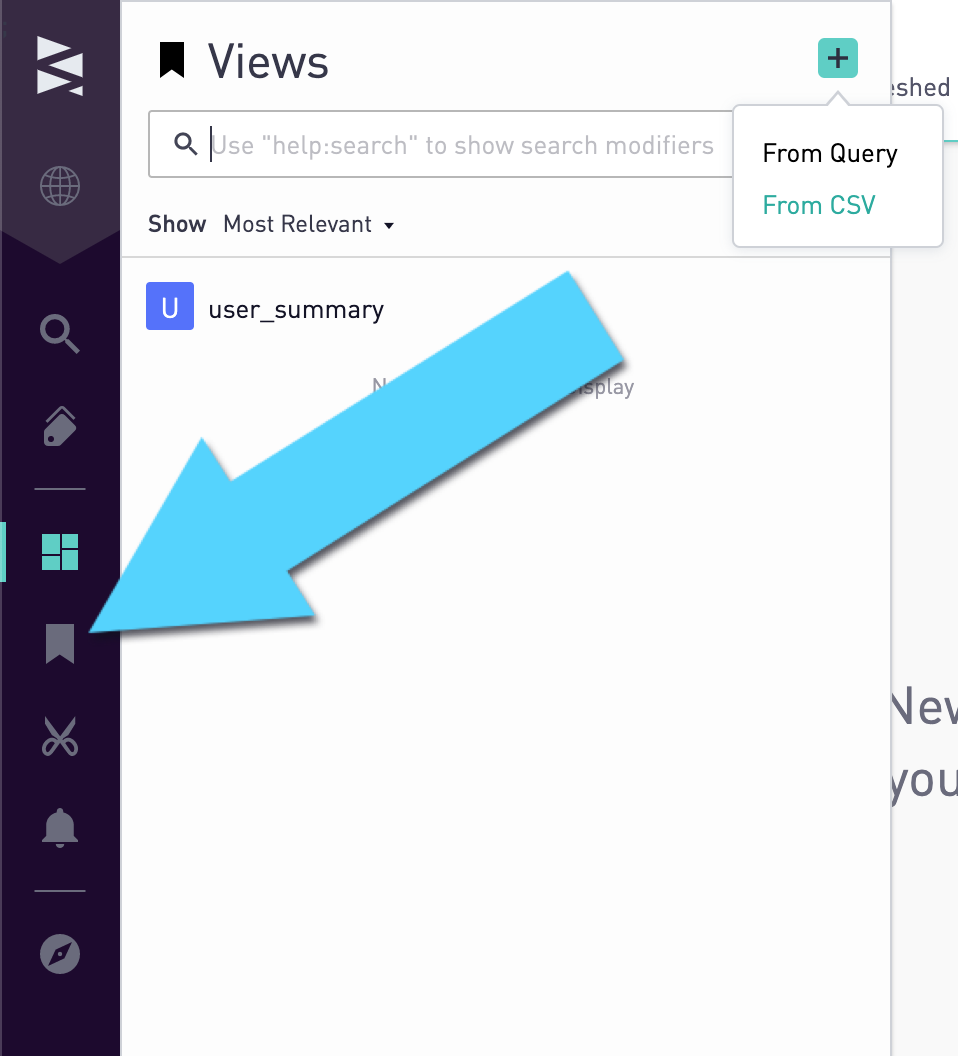
To upload a CSV, first click the Views menu in the sidebar. Then, click on the green plus-sign and select 'From CSV'.
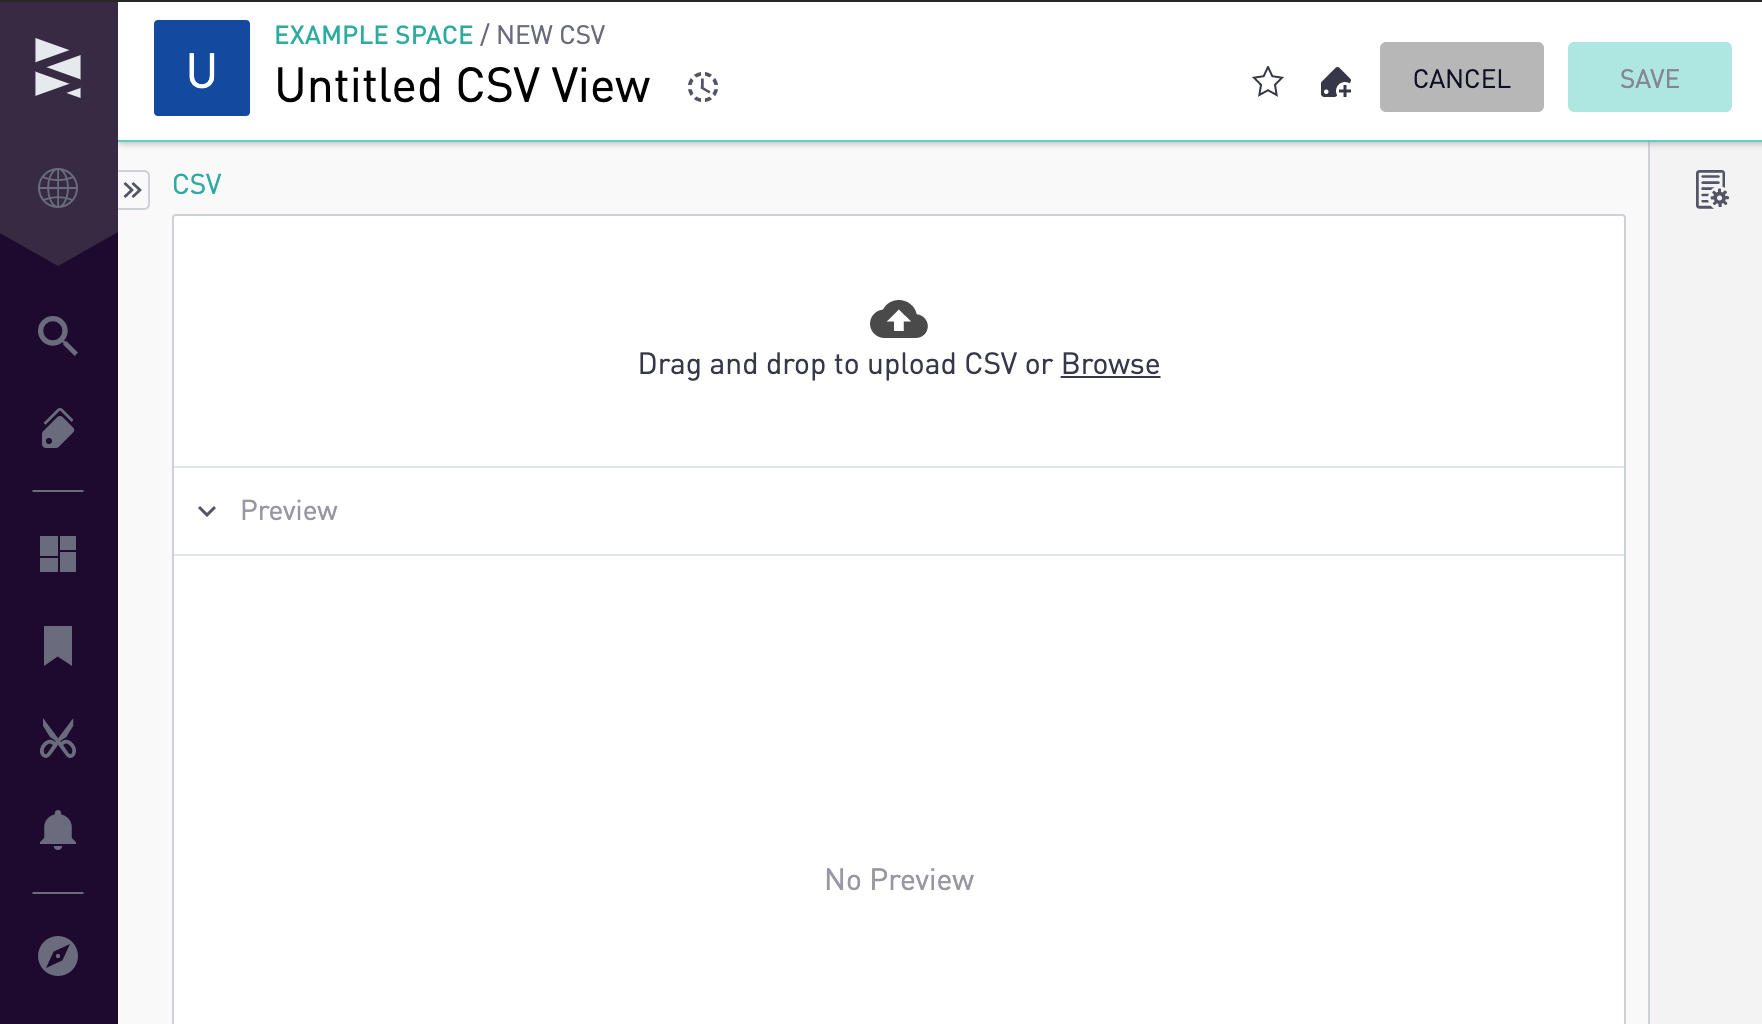
Once the upload menu is open, drag the CSV file into the corresponding area or click "Browse" to choose the file from a dialog.
<a href="#top">Back to top</a>
<a name="Troubleshooting"></a>
CSV Upload Requirements
CSV Upload functionality is only available with the cache add-on, and allows for up to 50MB of data to be uploaded per file. For the best experience, we recommend using CSV's 10MB or less.
CSV files can be delimited by semicolons, commas, pipes/vertical bars, or tabs.
CSVs must have a header row. The names in the CSV's header row will become the column names in the view. Because the CSVs will be stored as tables on Sisense's Redshift cache, they must adhere to Redshift's naming conventions:
- Contain only ASCII letters, digits, underscore characters (_), or dollar signs ($).
- Begin with an alphabetic character or underscore character. Subsequent characters may include letters, digits, underscores, or dollar signs.
- Be between 1 and 127 characters in length, not including quotes for delimited identifiers.
- Contain no quotation marks and no spaces.
- Not be a reserved SQL key word.
Additional information can be found here.
<a href="#top">Back to top</a>
<a name="NameCSV"></a>
Naming a CSV View
Once the CSV has been successfully uploaded, the user can name the CSV by editing the header that is titled "Untitled CSV View" by default.
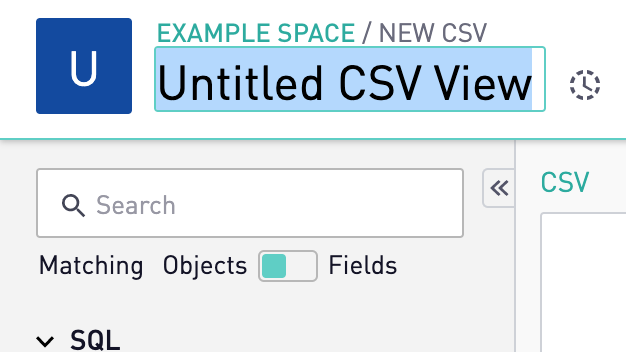
Note: Once a View is saved, it cannot be renamed, and the user will be required to delete the view and rename a new upload of the CSV.
<a href="#top">Back to top</a>
<a name="CSVStatus"></a>
CSV View Status
To use a CSV in charts and views, it needs to have been successfully uploaded to the Sisense Cache. After saving a new CSV View, hover over the information dot to check its status.
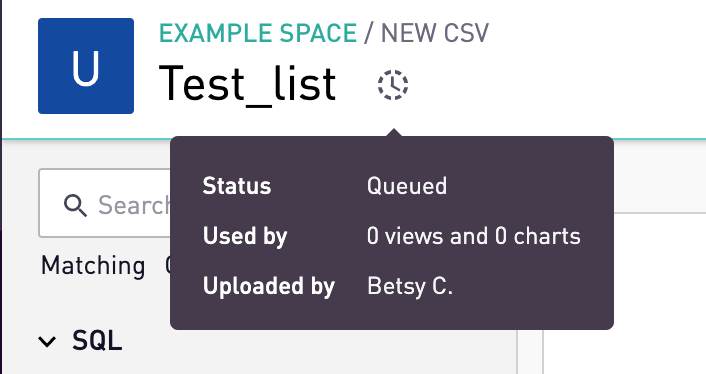
Once a CSV file starts to upload, the info icon turns into a grey dotted info icon:

Once it has successfully uploaded, the info text turns green:

If a CSV file fails to upload, the info icon turns into a red dotted info icon:

<a href="#top">Back to top</a>
<a name="SelectFromCSV"></a>
Selecting From a CSV View
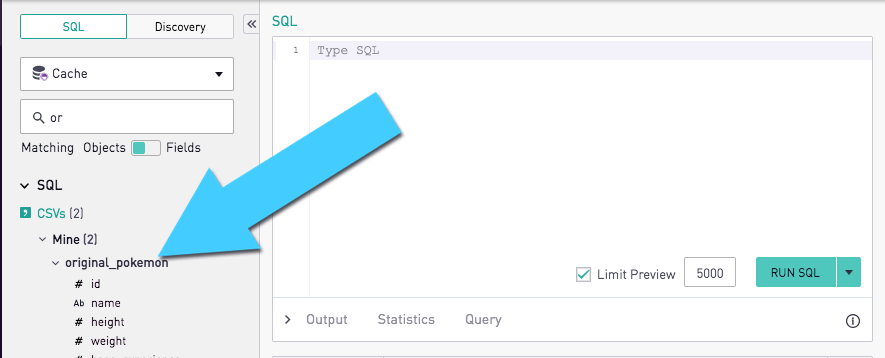
Once a CSV View has been saved and cached, it will be shown in the schema tab of any SQL editor. Here users can see what columns are available in the view.
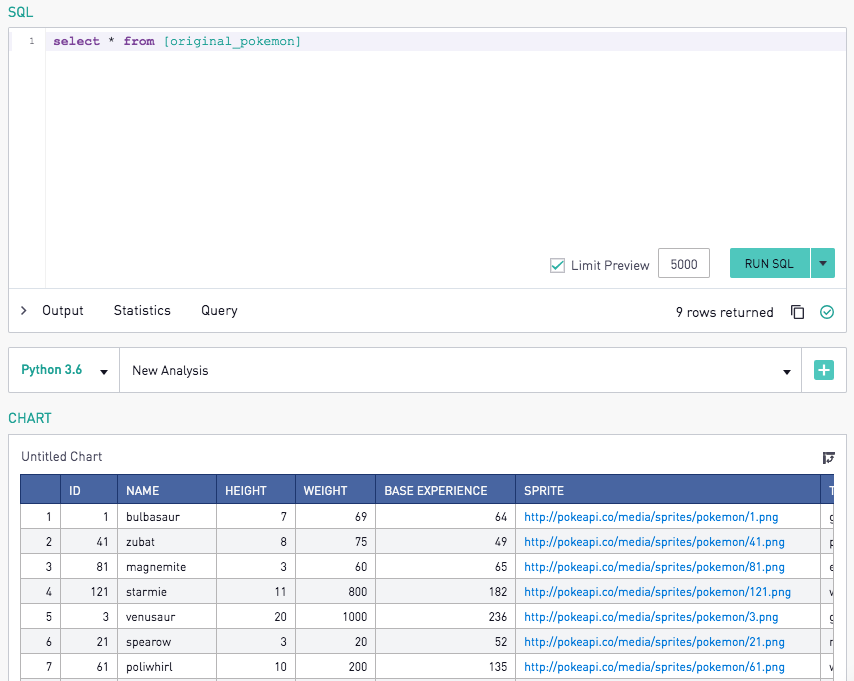
When writing a query, a SQL User can select from the view using square brackets, the same way as selecting from SQL-based views:
select * from [my_csv_view]
CSV Views can be aliased by calling the syntax within the square brackets:
select * from [my_csv_view as alias_name]
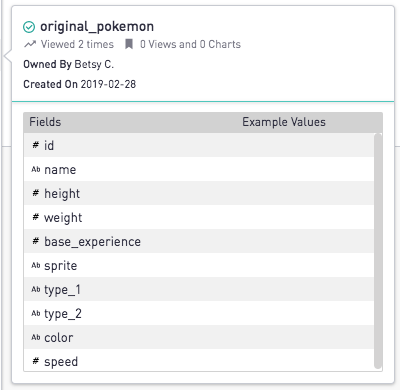
The example here uses a CSV View named original_pokemon to list stats of the original Pokemon.
<a href="#top">Back to top</a>
<a name="JoinToCSV"></a>
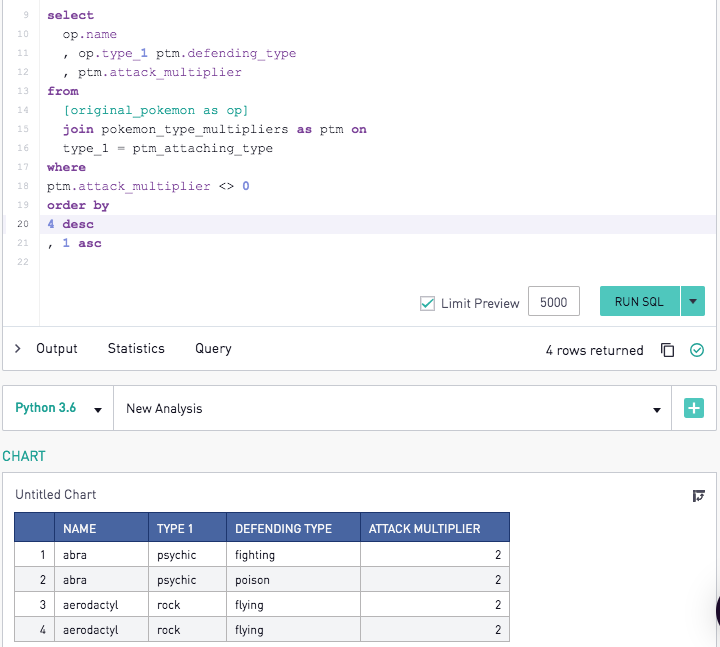
Joining to a CSV View
Joining to a CSV Upload has similar requirements to a cross-database join. Since a CSV View table only exists on the Sisense cache, for a query to run with a CSV View referenced, all tables in the query must be cached and the syntax should be Redshift compatible SQL. The Join syntax to be used should match normal Redshift Join syntax with the addition of above mentioned bracket notation for the CSV View.
<a href="#top">Back to top</a>
<a name="CSVSettings"></a>
CSV View Settings
<a name="CSVDataset"></a>
Publish a CSV View as a Dataset
For information on publishing a view as a dataset for use in Data Discovery charts, check out the documentation here.
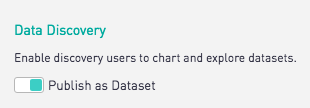
Note: Data Discovery is only available on select plans. Site administrators can contact their Customer Success Manager for additional information.
<a name="AutoArchive"></a>
Exclude From Auto Archive
When Auto Archive rules are set for a site, toggling this for a CSV View will ensure the view does not become archived, even if it goes unused for the specified amount of time. For information on Auto Archiving, check out the documentation here.
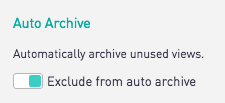
Note: Auto Archive is only available on select plans. Site administrators can contact their Customer Success Manager for additional information.
<a name="Official"></a>
Mark as Official
Site Admins have the ability to mark Views as Official.
<a name="TopicView"></a>
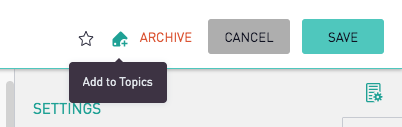
Adding a CSV View to a Topic
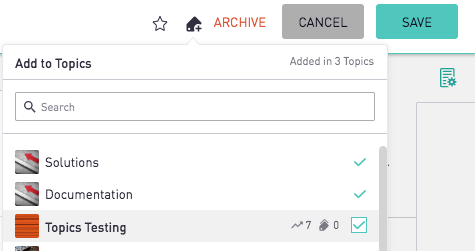
Topics are a collaborative way to organize CSV Views across the site and quickly find and navigate to CSV Views for a given topic. To add a view to a topic, click the Topics icon.
Select the topic that you want to add the CSV view to and click the box to add. The CSV View will then show up in the selected topic.
<a name="AddDescription"></a>
Adding a Description
To add a description, click and type into the Description textbox.
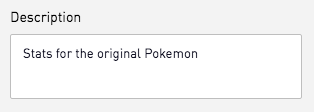
Once a description has been added, click outside of the text box to lock the description in place prior to saving. The description will show up with the CSV View owner, the CSV created date, the number of times the CSV was viewed, the number of views and charts that reference the CSV, and the column names when hovering over the view in the CSV View search bar.
<a name="CSVOwner"></a>
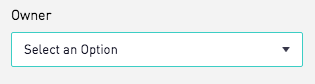
Changing a CSV View Owner
Changing the CSV View owner can be done from the Owner dropdown. This allows other users to know who to ask questions about the view.
<a href="#top">Back to top</a>
<a name="DeleteCSV"></a>
Archive and Delete a CSV View
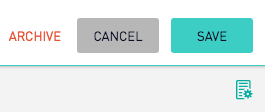
If a CSV View is no longer needed, it can be archived using the button in the upper right corner.
After confirming, this view will be archived and it will no longer appear in the search menu. More information on archiving objects can be found here.
An archived CSV View can be searched for and found via the standard search boxes in the left-hand navigation. The syntax to use is 'in:archived' in the search.
If a CSV View needs to be used after archiving, it can be unarchived by clicking the green "Unarchive" button in the upper right-hand corner.
If a CSV View should be fully removed after archiving, it can be deleted using the "Delete" button in the upper right-hand corner. After confirming, this view will be deleted permanently.

<a href="#top">Back to top</a>