
OneLogin SSO Integration
Adding OneLogin SSO to a Cloud Data Teams account is done in two steps. First, create a custom app in OneLogin that points to Cloud Data Teams. Second, configure Cloud Data Teams to direct users to the custom app.
⚠️ Please review the SSO Overview page before setting up OneLogin SSO. When performing a large-scale domain, SSO or SCIM change, please turn on Support Access prior to integrating, configuring and testing. It is recommended to coordinate with [email protected] so that they can assist.
Adding a custom app in OneLogin
From the apps tab of OneLogin, click "Add App".

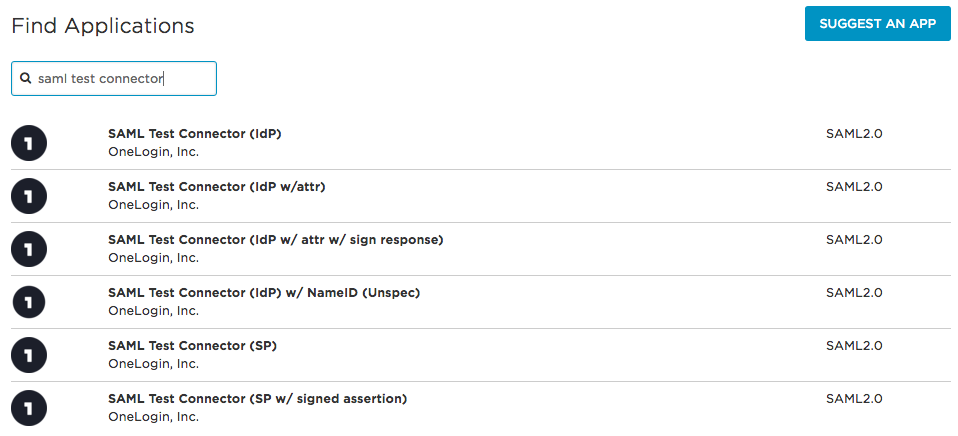
Search for "SAML Test Connector" and select "SAML Test Connector (IdP w/ attr w/ sign response)".
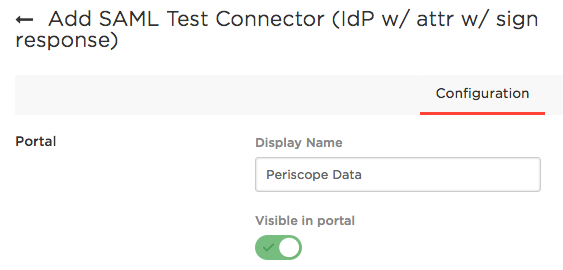
Configure the Display Name as "Periscope Data" then click save.
Click the "Configuration" tab and set these options:
- Audience is https://www.periscopedata.com/sso
- ACS (Consumer) URL Validator is ^https:\/\/www.periscopedata.com\/auth\/saml\/callback$
- ACS (Consumer) URL is https://www.periscopedata.com/auth/saml/callback
The URL validator is a regular expression and must include the backslashes and leading "^" and trailing "$".

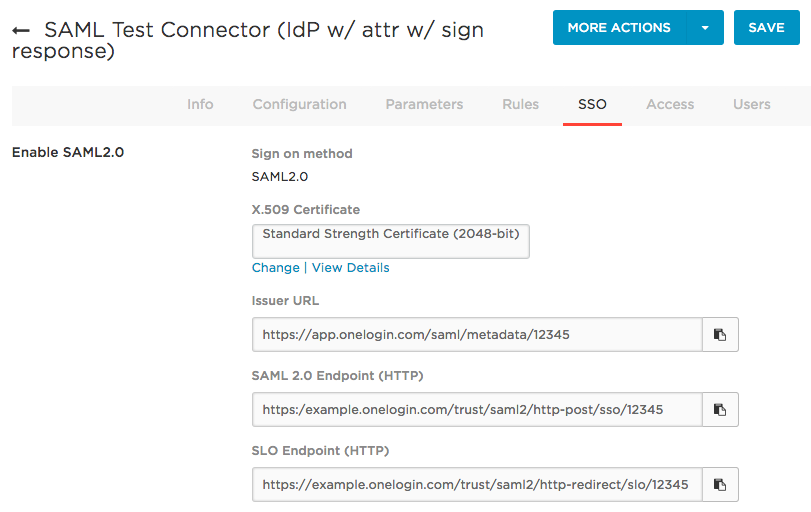
Navigate to the "SSO" tab next. Periscope Data requires three pieces of information from this page to enable SSO – the "Issuer URL", the "Saml 2.0 Endpoint" (not the SLO Endpoint), and the contents of the X.509 Certificate.
To get the contents of the X.509 Certificate, click "View Details" then copy the entire contents of the X.509 Certificate section on the details page. The "BEGIN CERTIFICATE" and "END CERTIFICATE" lines must be included.
Configuring Periscope Data with OneLogin settings
In Periscope Data, open the gear menu in the bottom left and open the Billing & Secuity menu. Only admins have access to these settings.
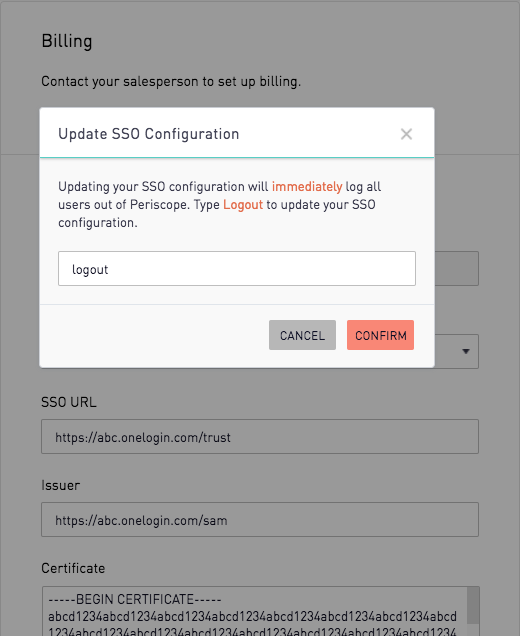
In the "Single Sign-On" section, select "OneLogin". Fill in the SSO Url fields as follows:
- SSO URL is OneLogin's SAML 2.0 Endpoint (HTTP)
- Issuer is OneLogin's Issuer URL
- x.509 Certificate is OneLogin's X.509 certificate and should start with "BEGIN CERTIFICATE" and end with "END CERTIFICATE".

Finally, confirm the SSO settings change by typing "Logout".
With that complete, Onelogin can be used to login to Periscope.