
Views
👤 This documentation is intended for SQL Users.
Sisense for Cloud Data Teams' Views let a user define a data set once that the whole team can use across the site. By using the Sisense Cache add-on, users have the option to allow Sisense to optimize use of the view by keeping it materialized as a table instead of a subquery.
<div>
<UL>
<LI><a href="#CreateView">Creating a View</a></LI>
<LI><a href="#CancelQuery">Canceling a Query</a></LI>
<LI><a href="#UsingView">Using Views in SQL</a></LI>
<LI><a href="#ViewLimits">View Limits</a></LI>
<LI><a href="#SettingsMenu">View Settings</a></LI>
<UL>
<LI><a href="#MaterializeView">Materializing a View</a></LI>
<LI><a href="#DataSet">Publish a View as a Dataset</a></LI>
<LI><a href="#ExcludefromArchive">Exclude From Auto Archive</a></LI>
<LI><a href="#Official">Mark As Official</a></LI>
<LI><a href="#TopicView">Adding a View to a Topic</a></LI>
<LI><a href="#Description">Adding a Description</a></LI>
<LI><a href="#ViewOwner">Changing a View Owner</a></LI>
</UL>
<LI><a href="#Archive">Archive and Delete a View</a></LI>
</UL>
</div>
<HR>
<a name="CreateView"></a>
Creating a View
To get started, click on the Views menu in the sidebar.

Click the "+" button and select 'From Query'. Then name the view.

Type SQL in the editor to define the view. The example here creates a view with all of the iOS Gameplays.

Once the SQL is completed, click "Save" in the upper right corner to save the view.
<a href="#top">Back to top</a>
<a name="CancelQuery"></a>
Canceling a Query
To cancel a query running on a redshift database, in the view editor, click the down arrow next to the "Run SQL" button at the top right of the screen and choose the "Cancel Query..." option:

Note: This option is only for queries run on a redshift database.
<a name="UsingView"></a>
<a href="#top">Back to top</a>
Using Views in SQL
Once a view is saved, it will be shown in the schema tab of any SQL editor. Here, users can see what columns are available in the view.

When writing a query, a SQL User can select from the view using square brackets:
select * from [my_view]
Views can be aliased by calling the syntax within the square brackets:
select * from [my_view as alias_name]
The example here uses the ios_gameplays view, defined above, to count new iOS Gameplays over time.

More examples of how to query views, including how to join them with tables and other views, can be found here.
<a href="#top">Back to top</a>
<a name="ViewLimits"></a>
View Limits
The number of rows returned in preview of a view's query results is limited to 5000 by default. This can be adjusted by either entering a new number into the Limit Rows text box, or by writing a LIMIT or TOP clause into a query.

If a LIMIT or TOP clause is defined in the query, the row limit defined in the UI will not be applied to the query. Row limits defined in the UI only apply to the preview of the view query, and are not used when the view is referenced in other queries or when the view is being materialized.

After the limit has been updated, the query will need to be re-run for the change to affect the results. If Limit Rows is unchecked, the preview query will run without a LIMIT or TOP clause applied to the query.

<a href="#top">Back to top</a>
<a name="SettingsMenu"></a>
View Settings
<a name="MaterializeView"></a>
Materializing a View
For information on materializing views, check out the documentation here.
Basic Materialization available with Cache and Managed Warehouse:

Flexible Materialization Schedules available with Data Engine on Your Warehouse:

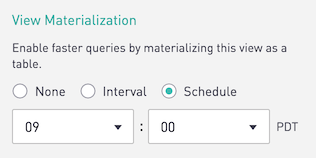
Note: Materializing views is only available with the Cache, Managed Warehouse, and Data Engine on Your Warehouse Infrastructure Options. Site administrators can contact their Account Manager for additional information.
<a name="DataSet"></a>
Publish a View as a Dataset
For information on publishing a view as a dataset for use in Data Discovery charts, check out the documentation here.
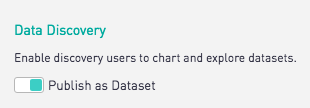
Note: Data Discovery is only available on select plans. Site administrators can contact their Account Manager for additional information.
<a name="ExcludefromArchive"></a>
Exclude From Auto Archive
When Auto Archive rules are set for a site, toggling this for a view will ensure the view does not become archived, even if it goes unused for the specified amount of time. For information on Auto Archiving, check out the documentation here.
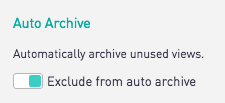
Note: Auto Archive is only available on select plans. Site administrators can contact their Account Manager for additional information.
<a name="Official"></a>
Mark as Official
Site Admins have the ability to mark Views as Official.
<a name="TopicView"></a>
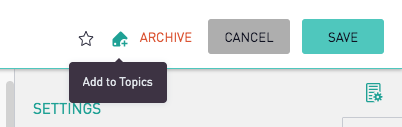
Adding a View to a Topic
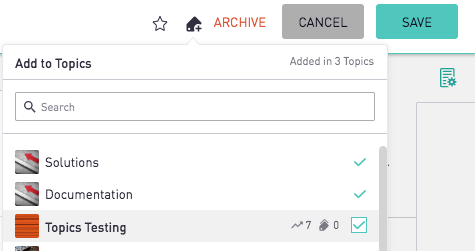
Topics are a collaborative way to organize Views across the site and quickly find and navigate to Views for a given topic. To add a view to a topic, click the Topics icon.
Select the topic that you want to add the view to and click the box to add. The View will then show up in the selected topic.
<a name="Description"></a>
Adding a Description
To add a description, click and type into the Description textbox.

Once a description has been added, click outside of the text box to lock the description in place prior to saving. The description will show up with the view code when hovering over the view in the View search bar.

<a name="ViewOwner"></a>
Changing a View Owner
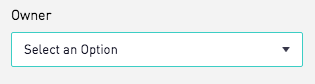
Changing the view owner can be done from the Owner dropdown. This allows other users to know who to ask questions about the view.
<a href="#top">Back to top</a>
<a name="Archive"></a>
Archive and Delete a View
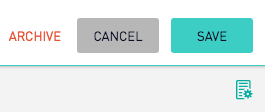
If a view is no longer needed, it can be archived using the button in the upper right corner.
After confirming, this view will be archived and it will no longer appear in the search menu. More information on archiving objects can be found here.
An archived view can be searched for and found via the standard search boxes in the left-hand navigation. The syntax to use is 'in:archived' in the search.
If a view needs to be used after archiving, it can be unarchived by clicking the green "Unarchive" button in the upper right-hand corner.
If a view should be fully removed after archiving, it can be deleted using the "Delete" button in the upper right-hand corner. After confirming, this view will be deleted permanently.

<a href="#top">Back to top</a>