
Adding, Moving, and Removing an Existing Filter
👤 This documentation is intended for SQL Users.
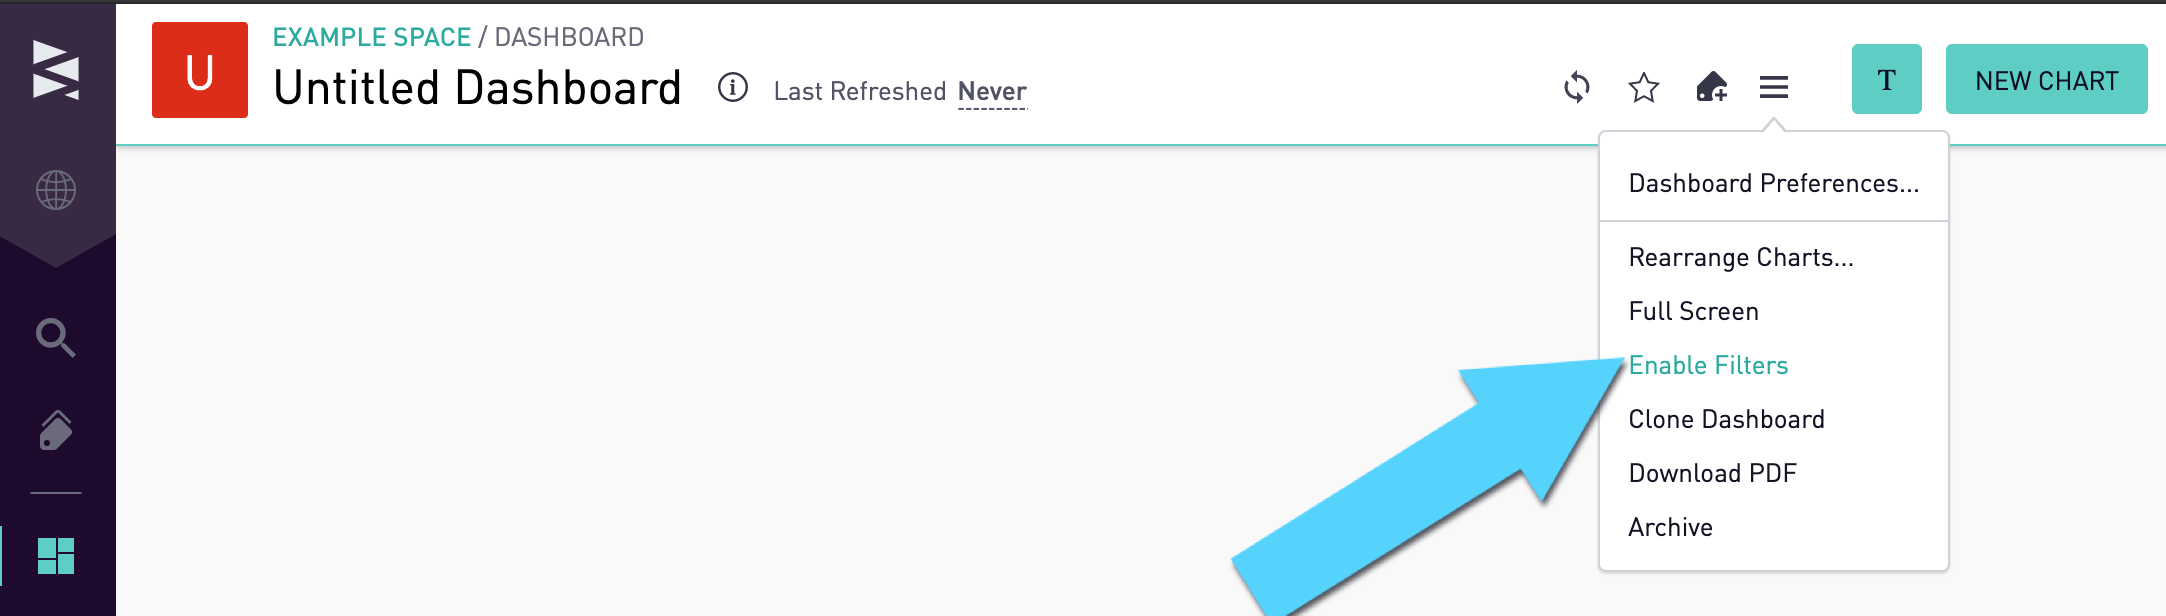
To add an existing filter to a dashboard, first enable filters on the dashboard if they are not already enabled. To enable filters, first click the hamburger icon in the top left corner and select Enable Filters.
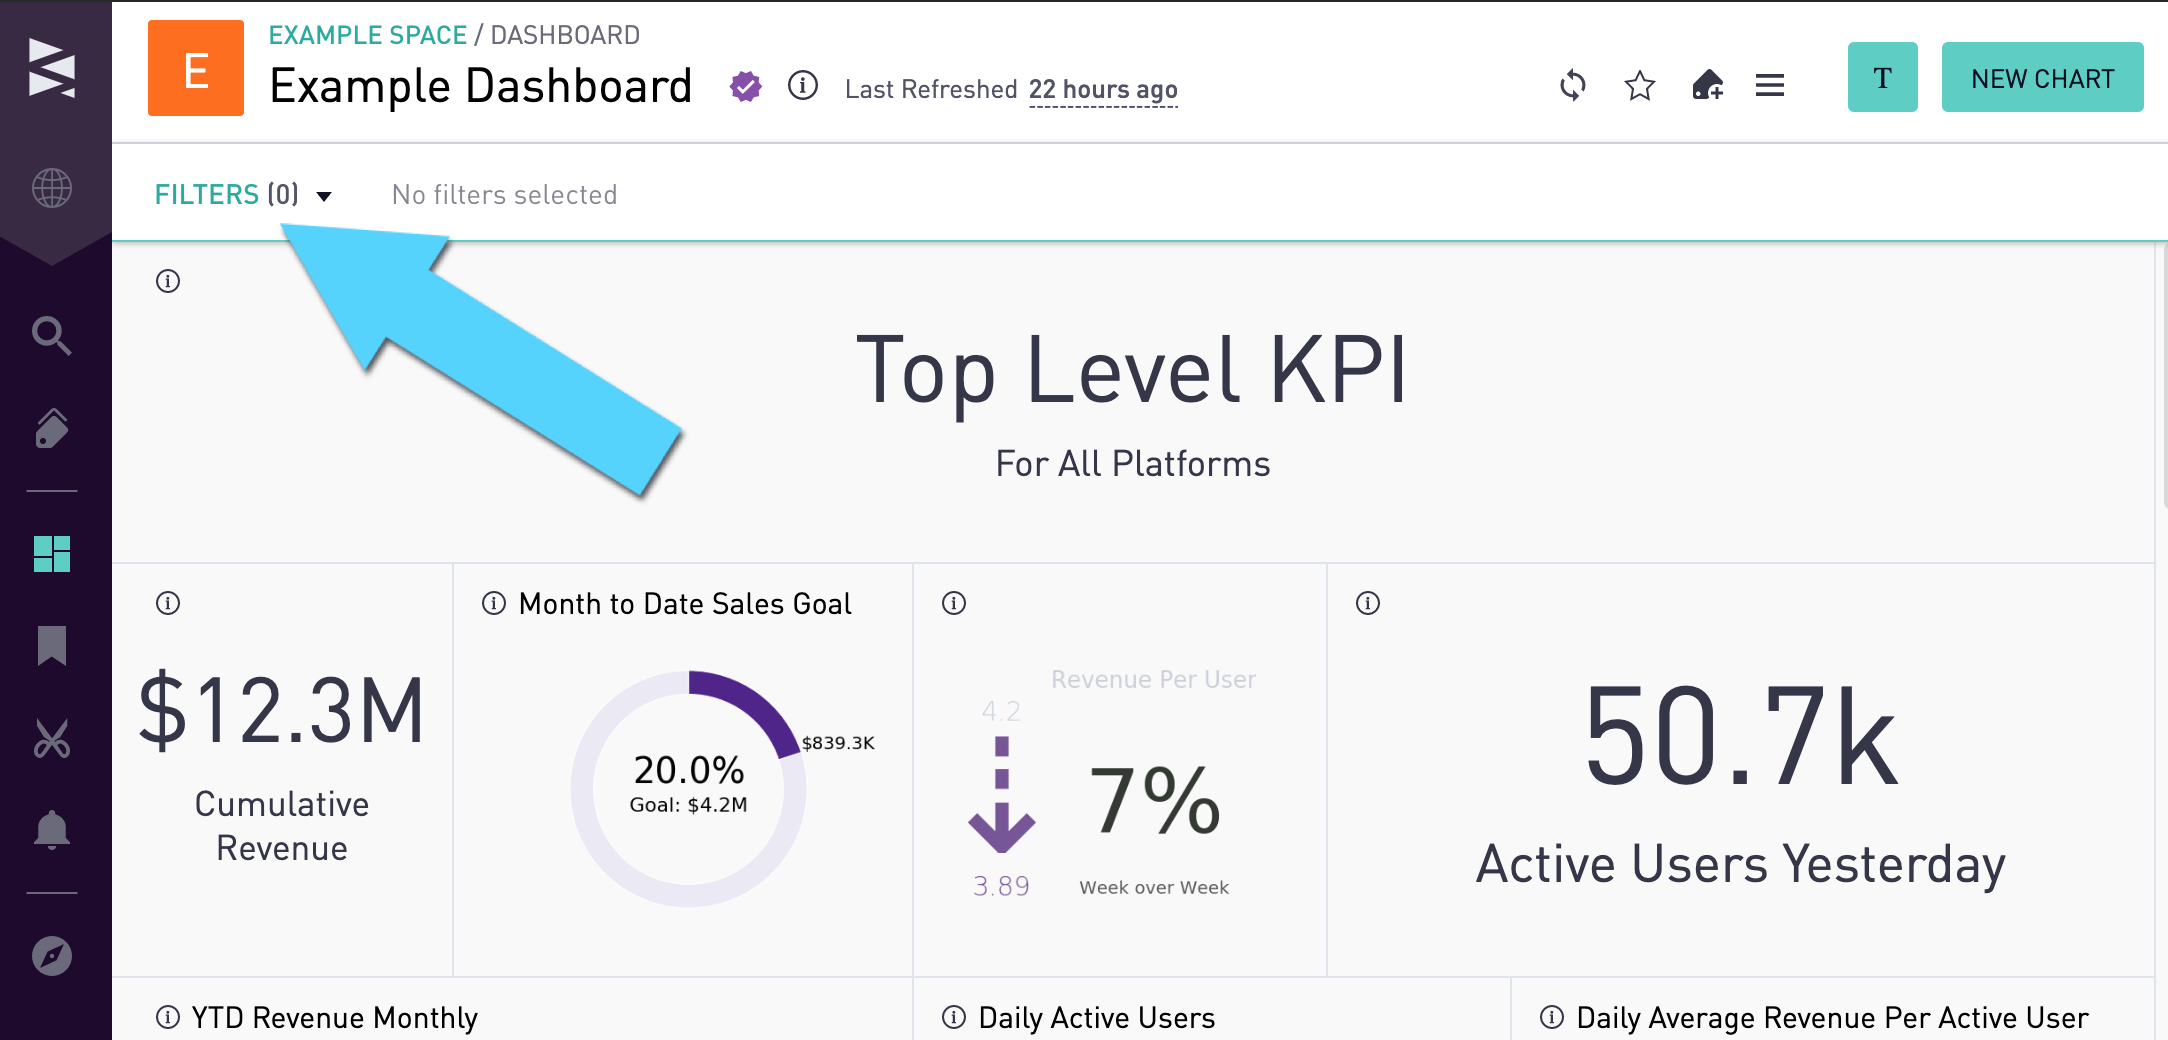
Then, click on the Filters ribbon right below the dashboard name.
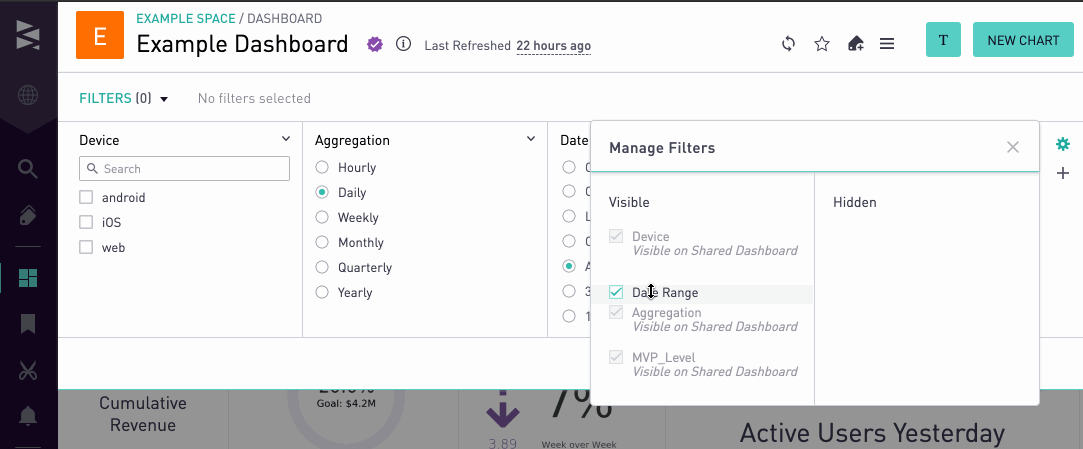
Under the menu that shows up, click the Filter Settings gear icon at the top right to bring up a list of all existing filters.

If a filter belongs to the Hidden list, checking its box will move it onto the dashboard. The filter will show up within the Filter ribbon and will be found in the Visible list.
Moving and Ordering Filters
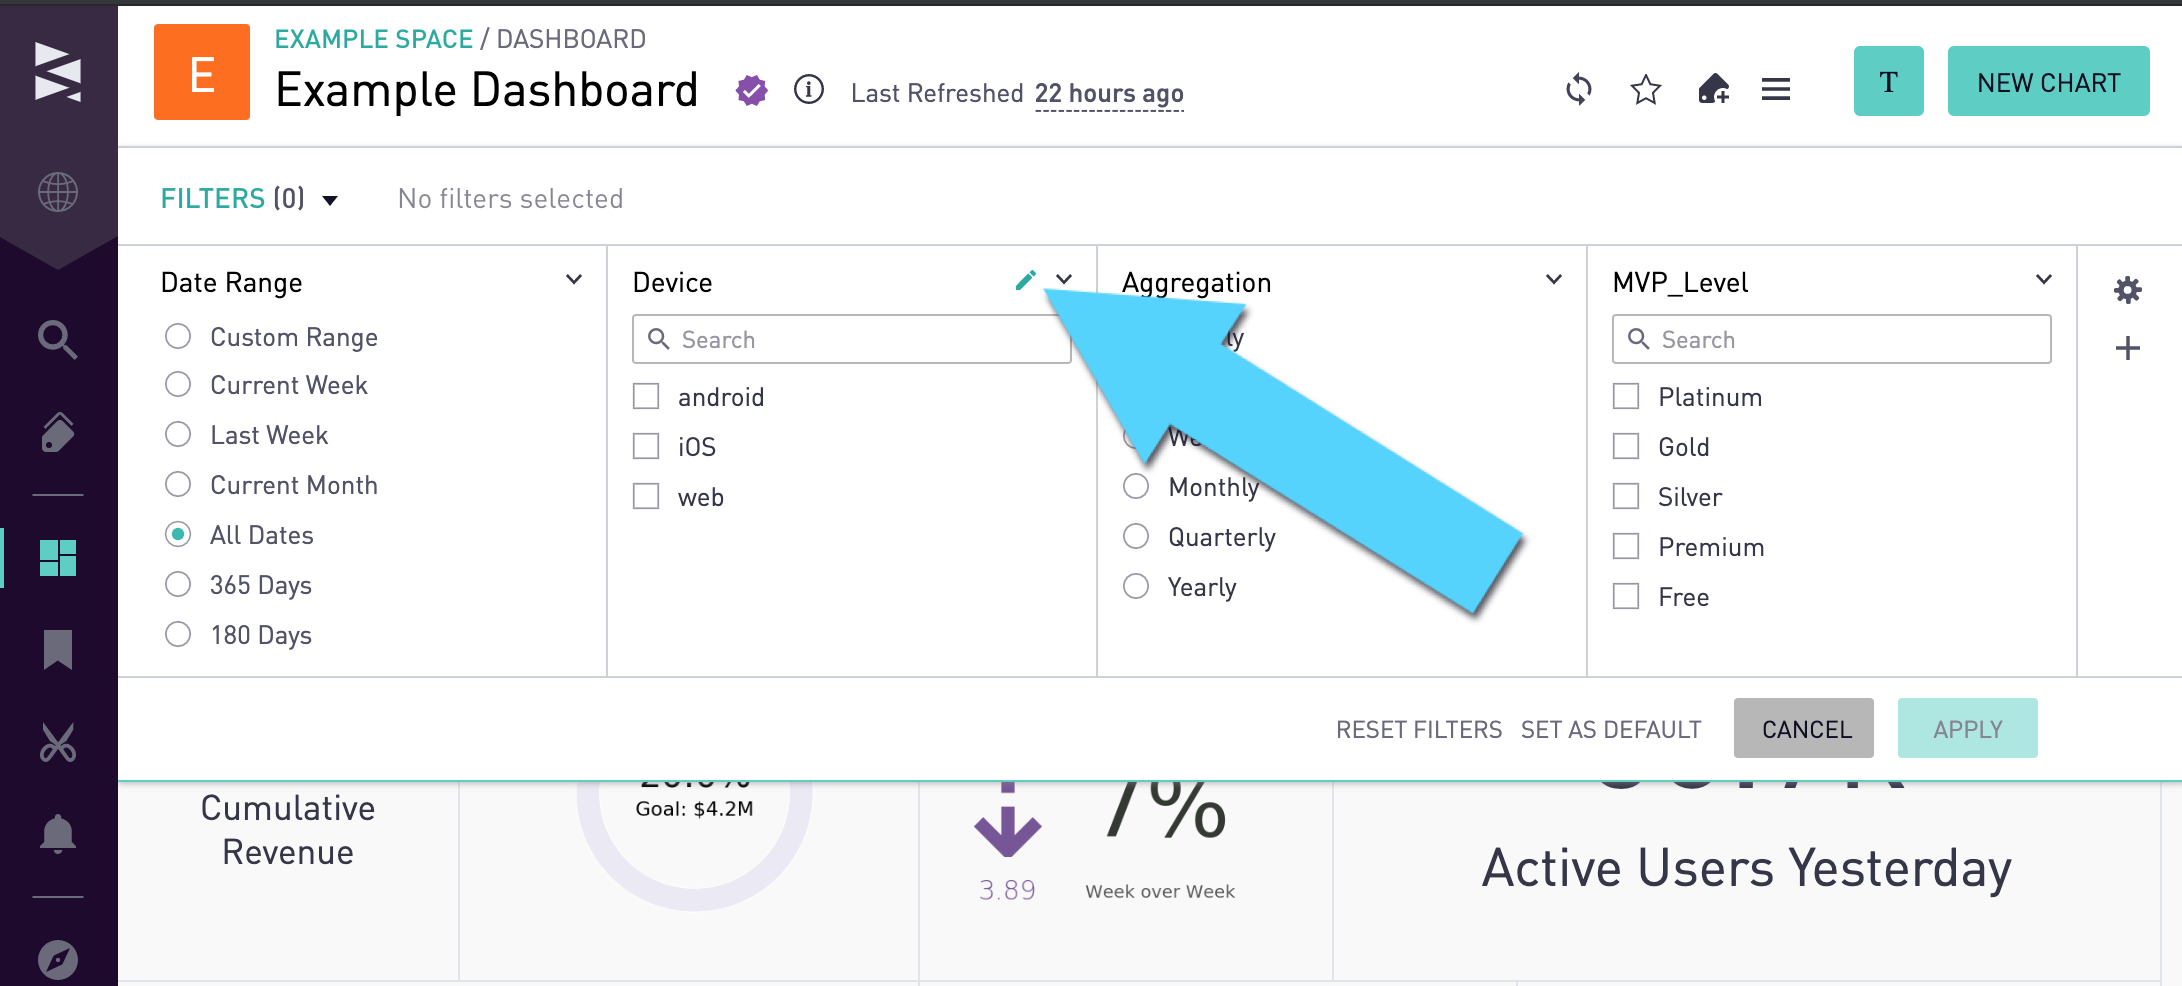
To move and order the filters on a dashboard, go to the same Filter Settings gear icon. From here, drag-and-drop the filters in the Visible list into the order preferred.
Removing an Existing Filter
To remove a filter from the dashboard without deleting it, click the Filter Settings gear icon and deselect the checkbox associated with that filter in the Visible list. The filter will be removed from the dashboard and moved to the Hidden list.
Filters can also be hidden from that specific filter's setting menu. Hover over the filter in question and click on the individual filter's pencil icon.
Click "Hide", and the filter will be removed from the dashboard but will not be deleted.

Deleting Filters
To delete a filter completely from the site, click the Filter's pencil icon at the right-hand corner to open the Filter editor, and choose "More Options". Check the box labeled "Enable Deletion" and click "Delete" to permanently remove this filter from all dashboards.

Filters that are visible to shared or embedded dashboards cannot be hidden or deleted from the dashboard unless they are first removed from the shared dashboards.
Note: Users must have edit permissions on the dashboard in order to add and remove filters.